How to Easily Copy a Column From One Sheet to Another in Google Sheets?
Google Apps Script is a tool
In this blog, I will be sharing a script that allows you to easily select a column in a Google Sheets spreadsheet and copy it to another spreadsheet while ensuring that the values are aligned in the same rows. Whether you're a Google Apps Script Developer or just someone looking to streamline their workflow, this script will be a helpful tool for you.
This is Nibesh Khadka. I am a freelance Google Apps Script Developer and Content Creator.
Referencing Columns Before Copying
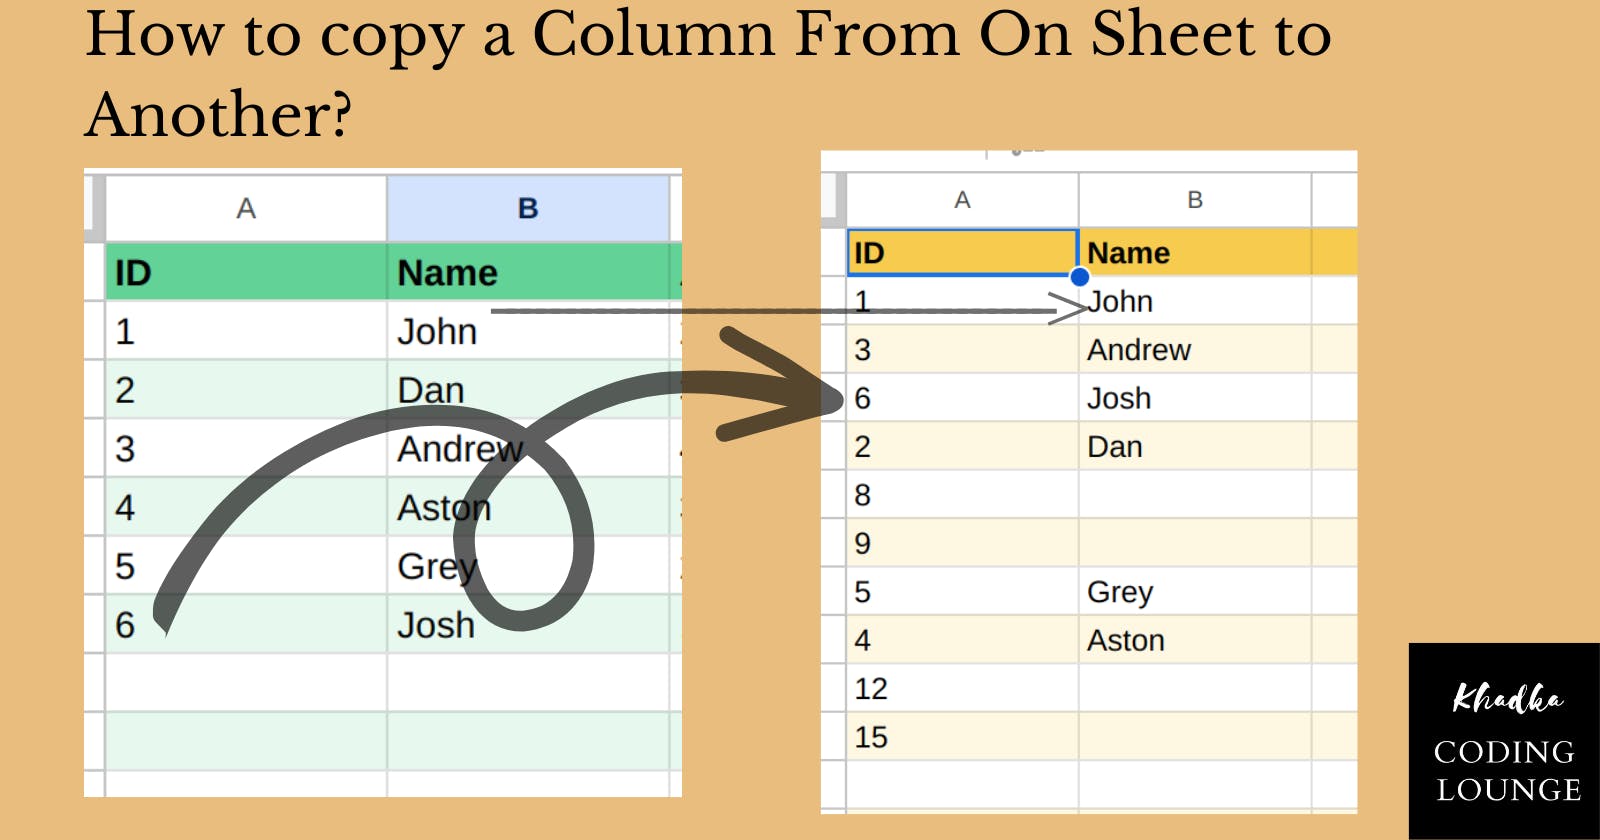
Copying a column from one sheet to another can be challenging if we don't have a unique column as a reference to put the values in the correct column. We can use columns like ID, Email, or any other column that exists in both sheets as a reference. In this article, we'll create a spreadsheet with two sheets and use the "ID" column as a reference to copy the "Name" column from Sheet1 to Sheet2.
You can just download and use this sheet or create your own. You can either follow the steps or download the complete code from the git repository.
Script Editor
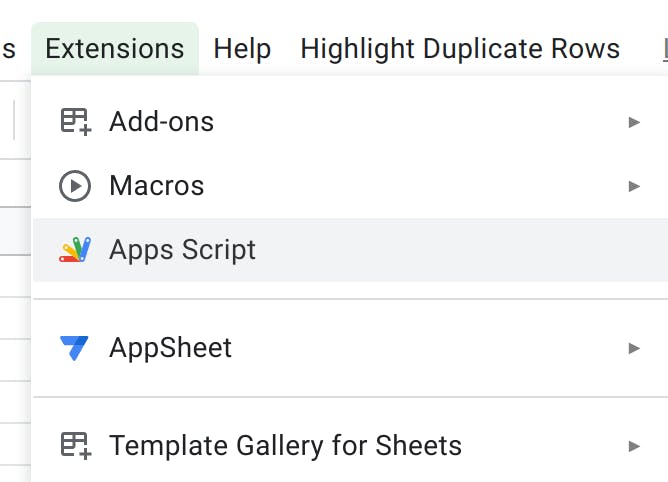
Now this is the bound script. So, open the spreadsheet you want to use for this project and open the script editor from there.

HTML Form
For this project, unlike in the previous one, we'll be using Custom Dialog Boxes with HTML instead of UI prompts because we'll need multiple input boxes for this project.
Create a new HTML file in your script editor. Then copy and paste the following codes
<!DOCTYPE html>
<html>
<head>
  <base target="_top">
  <!-- <style>
    .targetColumnInfo {
      color: grey;
      font-size: 10px;
    }
  </style> -->
</head>

<body>
  <form onsubmit="formSubmitHandler(event)">
    <h2>Source Sheet</h2>
    <label for="sourceSheet">Source Sheet Name:</label><br>
    <input type="text" id="sourceSheet" name="sourceSheet"><br>
    <label for="referenceColumn">Reference Column Name</label><br>
    <input type="text" id="referenceColumn" name="referenceColumn"><br>
    <label for="sourceColumn">Source Column To Copy From:</label><br>
    <input type="text" id="sourceColumn" name="sourceColumn"><br>
    <hr>
    <h2>Target Sheet</h2><br>
    <label for="targetSheet">Target Sheet Name:</label><br>
    <input type="text" id="targetSheet" name="targetSheet"><br>
    <label for="targetReferenceColumn">Reference Column Name</label><br>
    <input type="text" id="targetReferenceColumn" name="targetReferenceColumn"><br>
    <label for="targetColumn">Target Column To Copy To:*</label><br>
    <input type="text" id="targetColumn" name="targetColumn"><br>
    <!-- <p class="targetColumnInfo">*Leave Last Input Empty to create new target column</p> -->

    <input type="submit" value="Submit" />

  </form>

  <script>
    function formSubmitHandler(event) {

      const sourceSheet = event.target['sourceSheet'].value;
      const referenceColumn = event.target['referenceColumn'].value;
      const sourceColumn = event.target['sourceColumn'].value;
      const targetSheet = event.target['targetSheet'].value;
      const targetReferenceColumn = event.target['targetReferenceColumn'].value;
      const targetColumn = event.target['targetColumn'].value ?? "";
      const data = [sourceSheet, referenceColumn, sourceColumn, targetSheet, targetReferenceColumn, targetColumn];

      // call server side function
     google.script.run.withSuccessHandler(closeDialog).setTargetColumns(data);

      event.preventDefault();

    }

    function closeDialog() { google.script.host.close() }
  </script>
</body>
</html>
There are two script runners to notice here.
withSuccessHandler() is used to link the function in the form in the front-end to the function in the backend(script) code during operation success, in this case, setTargetColumns() is the backend function we're using.
close() which is used to close the dialog box. We are using it with withSuccessHandler() to call the backend and then close the dialog box.
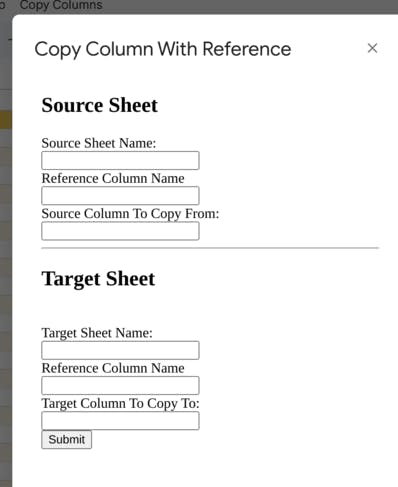
When rendered the Form looks like this:

Feel free to style the HTML Form to make it more beautiful.
In this HTML form you'll have to provide six pieces of information:
The name of the Source Worksheet.
The name of the Reference Column in the source sheet.
The name of the Source Column in the source sheet whose value is to be copied.
The name of the Target Worksheet where the value is to be copied.
The name of the Reference Column in the target sheet.
The name of the Target Column in the target sheet, that will hold the copied value.
Copy Column to Different Sheet
Now let's write the script to copy the values from one column to another.
function renderForm() {
  const html = HtmlService.createHtmlOutputFromFile('form')
    .setWidth(400)
    .setHeight(600);// play with dimension to fit your need
  SpreadsheetApp.getUi()
    .showModalDialog(html, "Copy Column With Reference");
}

//["Sheet1", "ID", "Name", "Sheet2", "ID", "Name"]
function setTargetColumns(data) {
  try {
    const sourceSheetName = data[0];
    const referenceColumnName = data[1];
    const sourceColumnName = data[2];
    const targetSheetName = data[3];
    const targetReferenceColumnName = data[4];
    const targetColumnName = data[5];

    // get sheet and data
    const sheet = SpreadsheetApp.getActiveSpreadsheet();
    const sourceSheet = sheet.getSheetByName(sourceSheetName);

    const sourceSheetData = sourceSheet.getDataRange().getValues();
    const sourceSheetLastRow = sourceSheetData.length;
    const sourceSheetLastColumn = sourceSheetData[0].length;
    // get header column of source sheet
    const sourceSheetHeader = sourceSheet.getRange(1, 1, 1, sourceSheetLastColumn).getValues().flat();

    // find the index of the given column names
    const referenceColumnIndex = sourceSheetHeader.indexOf(referenceColumnName.trim());
    if (referenceColumnIndex === -1) throw "Reference Column Not Found";

    const sourceColumnIndex = sourceSheetHeader.indexOf(sourceColumnName.trim());
    if (sourceColumnIndex === -1) throw "Source Column Not Found"; // if the name is not found then throw error

    const sourceSheetData2 = [sourceSheet.getRange(2, referenceColumnIndex + 1, sourceSheetLastRow, 1).getValues().flat(), sourceSheet.getRange(2, sourceColumnIndex + 1, sourceSheetLastRow, 1).getValues().flat()]


    const targetSheet = sheet.getSheetByName(targetSheetName);
    const targetSheetData = targetSheet.getDataRange().getValues();
    const targetSheetLastRow = targetSheetData.length;


    const targetReferenceColumnIndex = sourceSheetHeader.indexOf(targetReferenceColumnName.trim());
    if (targetReferenceColumnIndex === -1) throw "Target Sheets Reference Column Not Found";

    const targetColumnIndex = sourceSheetHeader.indexOf(targetColumnName.trim());
    if (targetColumnIndex === -1) throw "Target Sheet's Target Column Not Found";

    const targetSheetRefData = targetSheet.getRange(2, targetReferenceColumnIndex + 1, targetSheetLastRow - 1, 1).getValues().flat();
    const targetSheetColData = targetSheet.getRange(2, targetColumnIndex + 1, targetSheetLastRow - 1, 1).getValues();


    for (let i = 0; i < sourceSheetData2[0].length; i++) {
      for (let j = 0; j < targetSheetRefData.length; j++) {
        if (targetSheetRefData[j] === sourceSheetData2[0][i]) {
          targetSheetColData[j] = [sourceSheetData2[1][i]];
          break;
        }
        continue;
      }
    }
    // set new values
    targetSheet.getRange(2, targetColumnIndex + 1, targetSheetLastRow - 1, 1).setValues(targetSheetColData);

  } catch (e) {
    // alert error
    SpreadsheetApp.getUi().alert(`Error: ${e}`)
  }
}


/**
 * Menu creates menu UI in the document it's bound to.
 */
function createCustomMenu() {
  const menu = SpreadsheetApp.getUi().createMenu("Copy Columns");

  menu.addItem("Copy Column", "renderForm");
  menu.addToUi();
}


/**
 * OnOpen trigger that creates menu
 * @param {Dictionary} e
 */
function onOpen(e) {
  createCustomMenu();
}

/**
 * This script is for safely and accurately copying one column to
 * another column in two sheets while properly aliging with other
 * rows.
 * It is created in such a way that it only works with bound script.
 *
 * Created by: Nibesh Khadka.
 * linkedin: https://www.linkedin.com/in/nibesh-khadka/
 * website: https://nibeshkhadka.com
 */
Now, similar to the previous blogs, you can now just:
Save the code.
Reload the spreadsheet. Where you'll see the custom menu as shown below
And execute the function.
After this, you'll see a menu like the image below in the spreadsheet.

Error
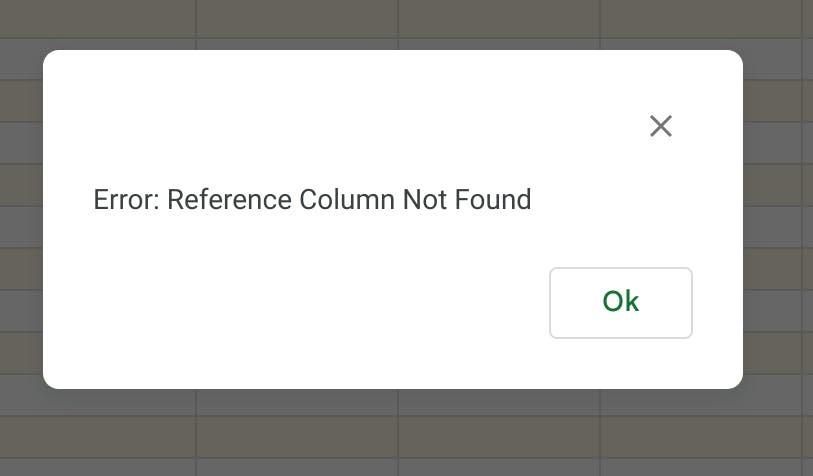
In case you leave any input box empty or you gave the wrong names to the boxes, you'll see the error alert like the image below.

Thank You for Your Time
My name is Nibesh Khadka, and as a freelance automation expert, I specialize in automating Google products with Apps Script. So let's get started! If you need my services let me know.
Don’t forget to like and share this blog.

